Waiting list process
Waiting list option is used for an event with limited number of participants. Event organizer can let the event "open" with waiting list option in case he will have more slots available
1. Enabled waiting list in Edit event + email confirmation for waiting list + limit the number of users as desired:
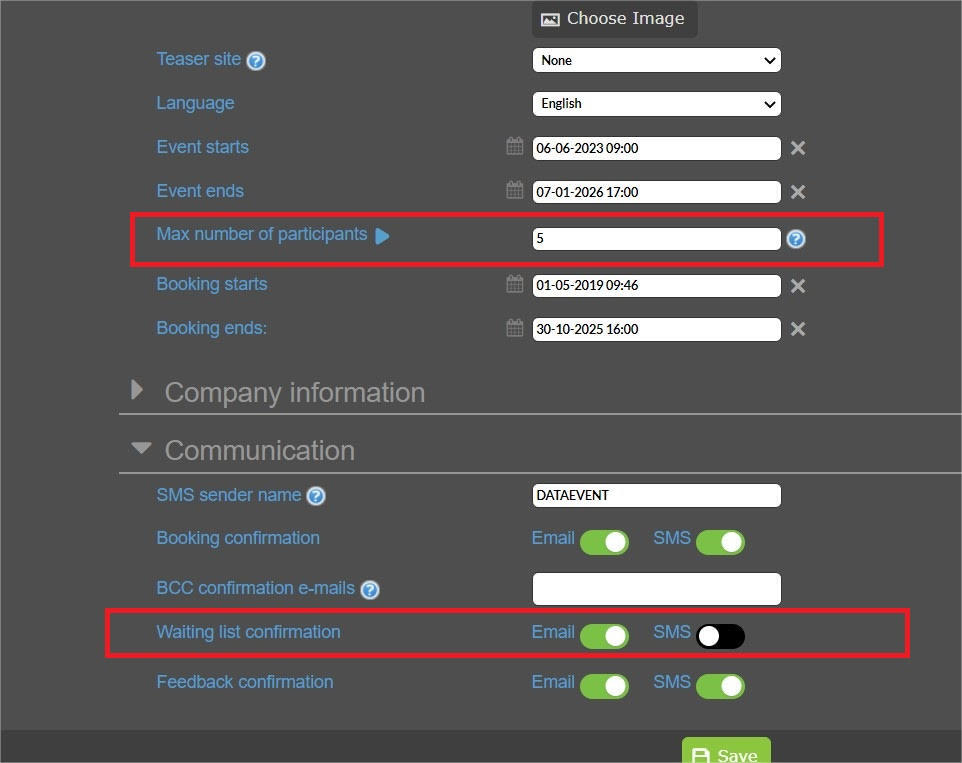
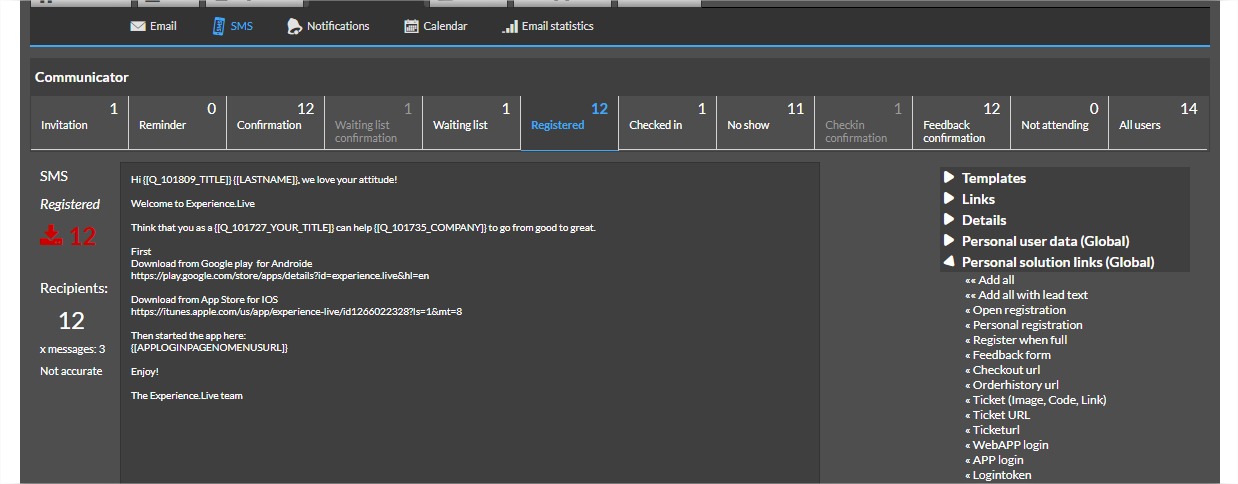
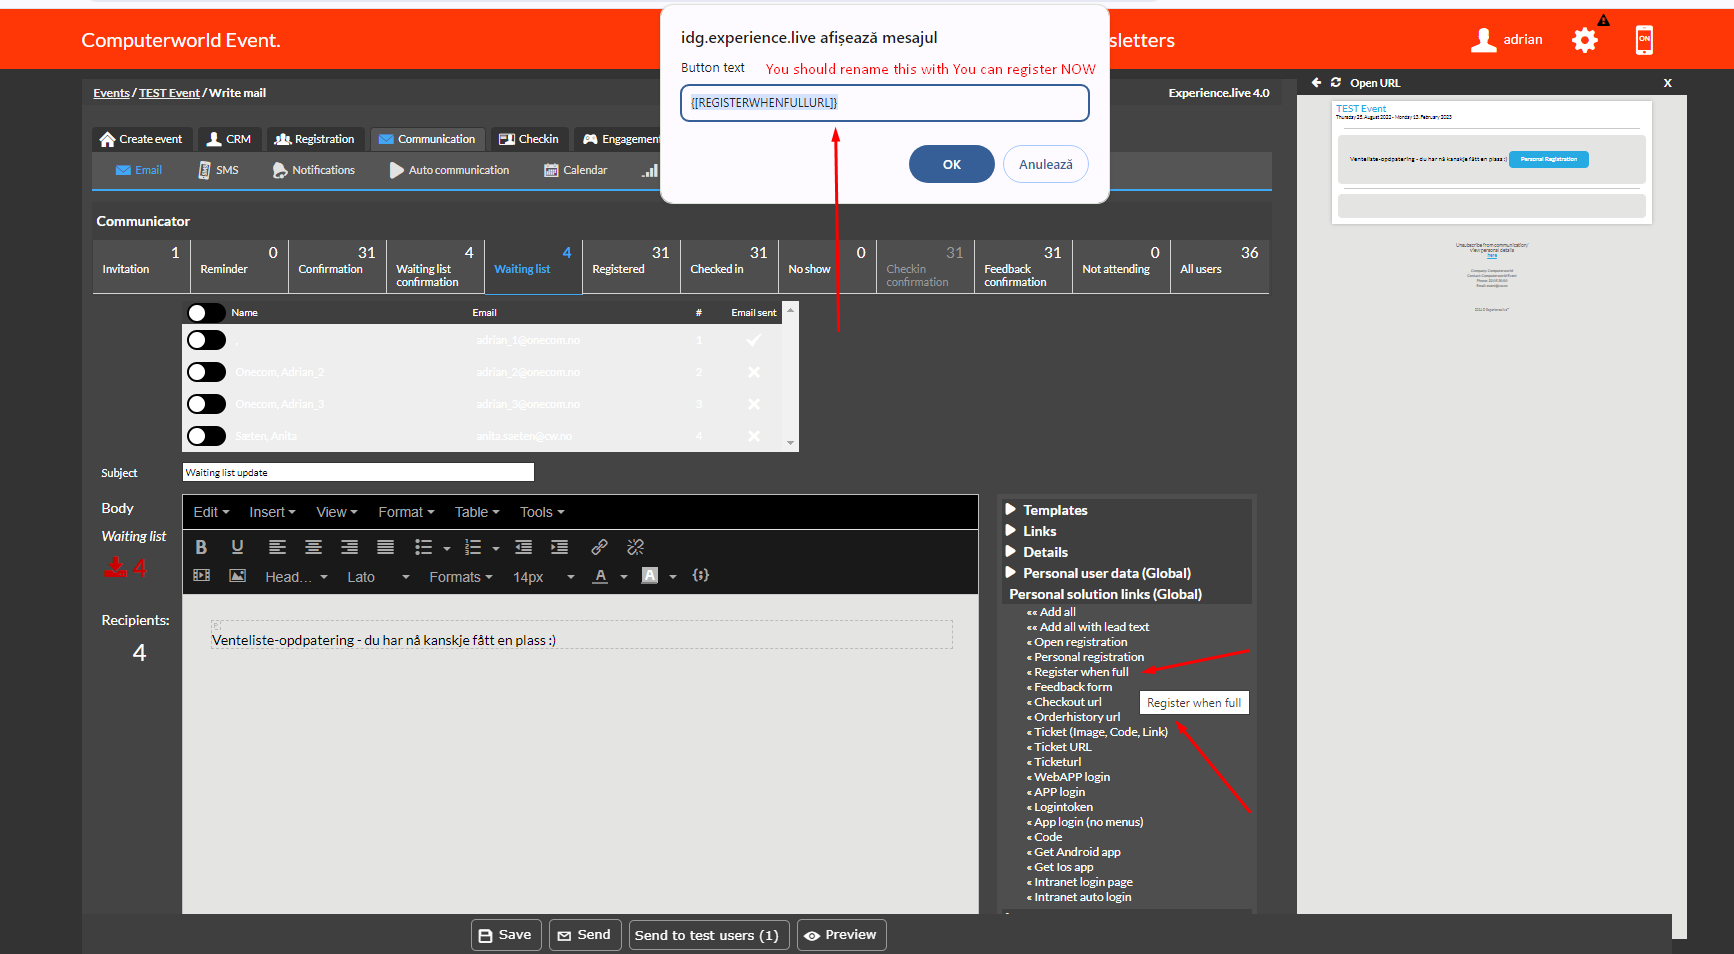
2. Enable Email/SMS for Waiting list tab list here:
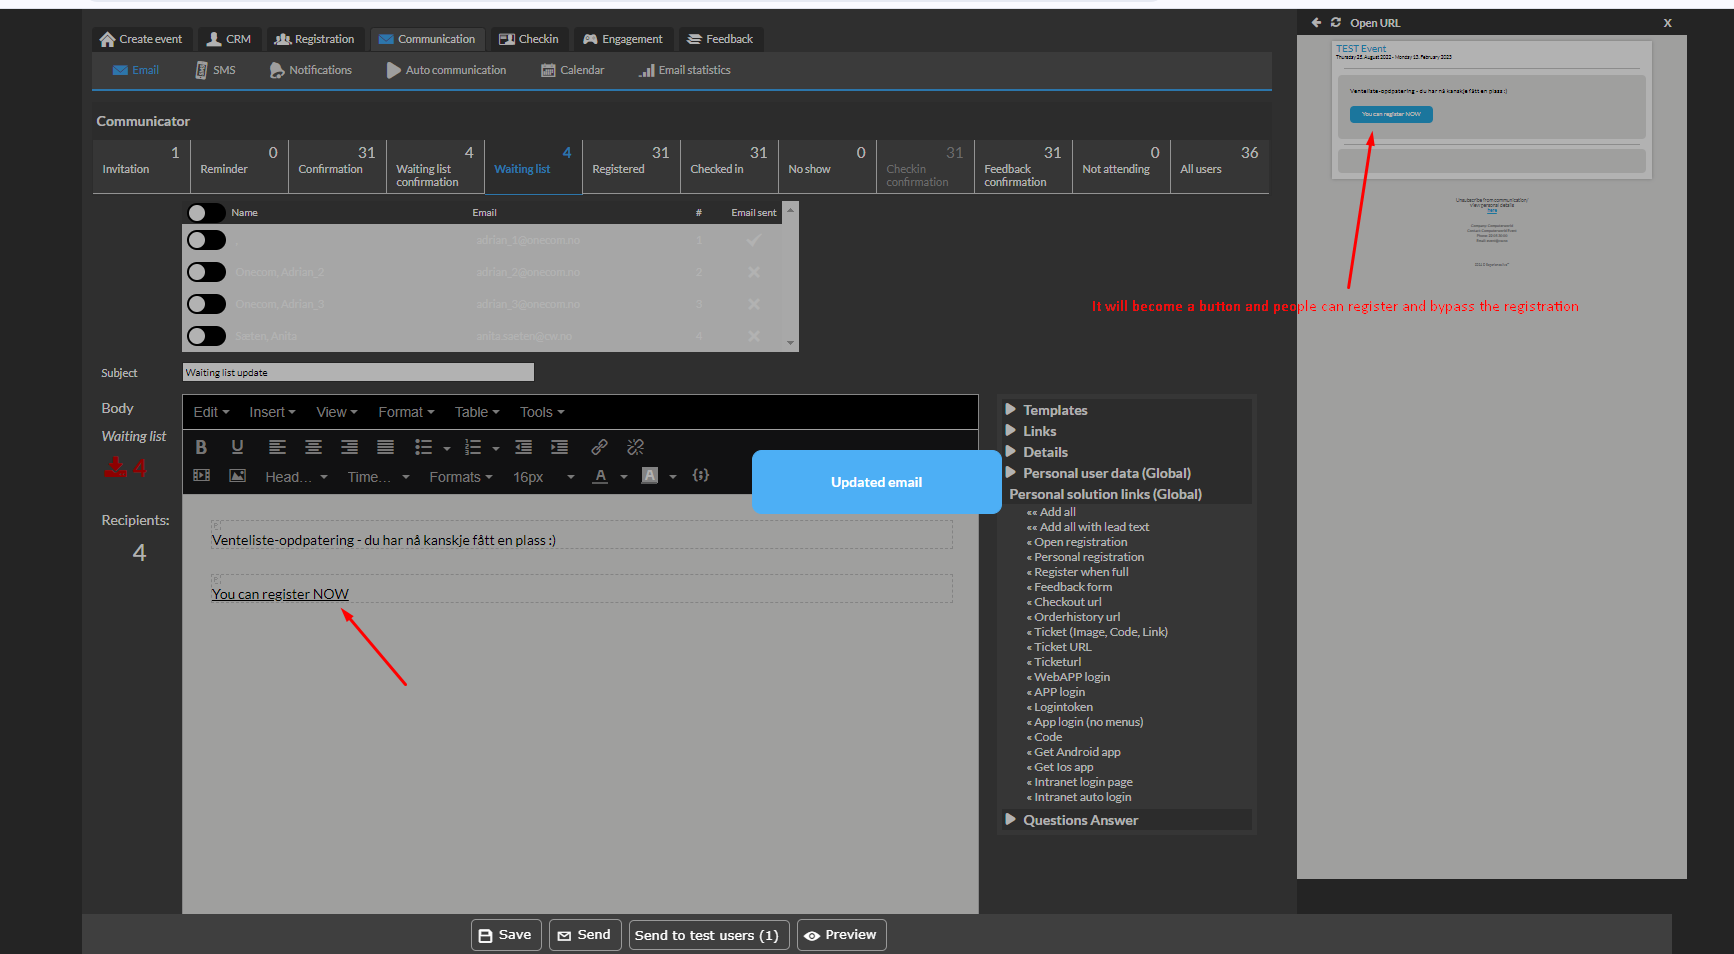
Here you can add the link {[REGISTERWHENFULLURL]} which it should be renamed as you want in the pop-up window. This will become a button in the email you will send from here and the users who will get this email will be able to register to the event without increasing the number of participants in Event Settings. It's a back door entrance for the people in the waiting list.
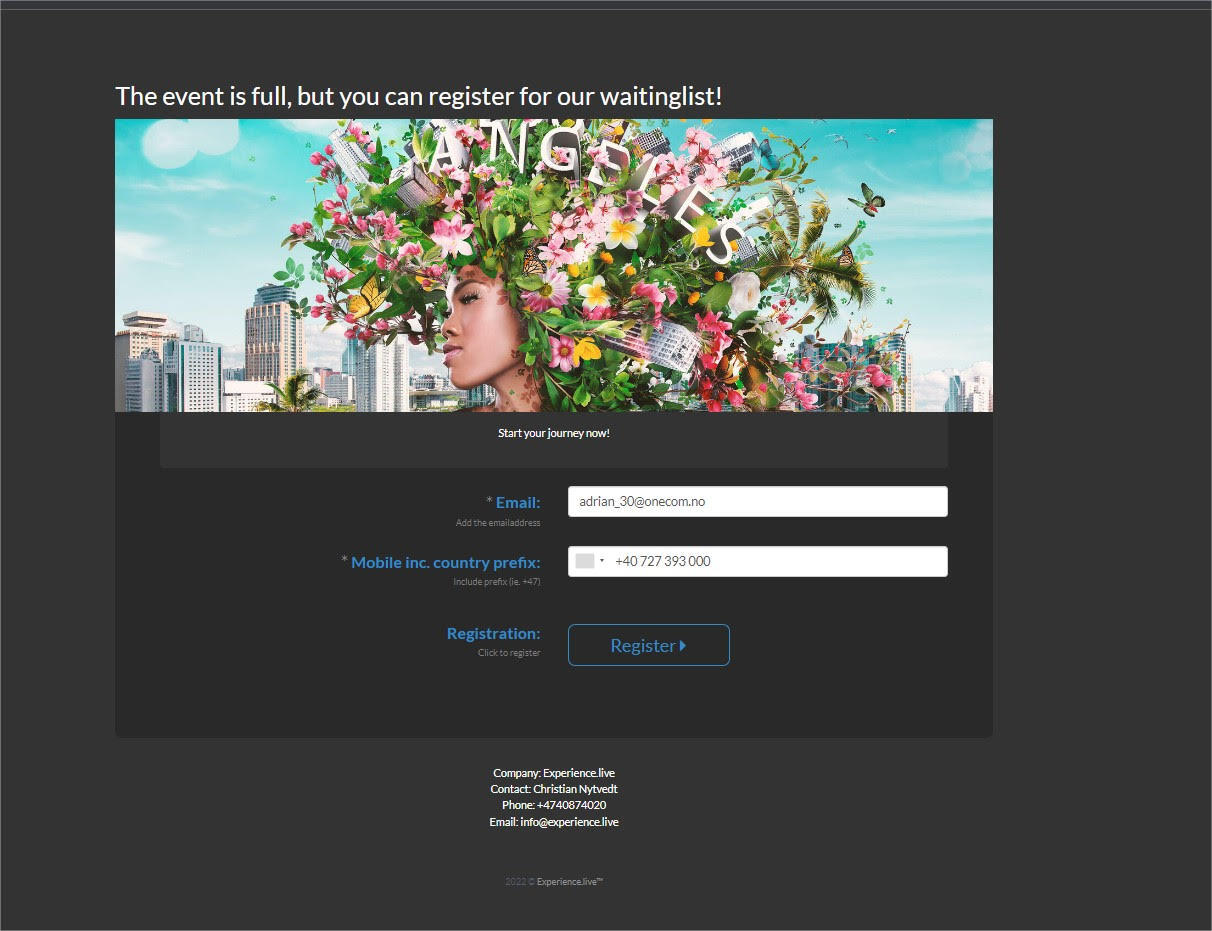
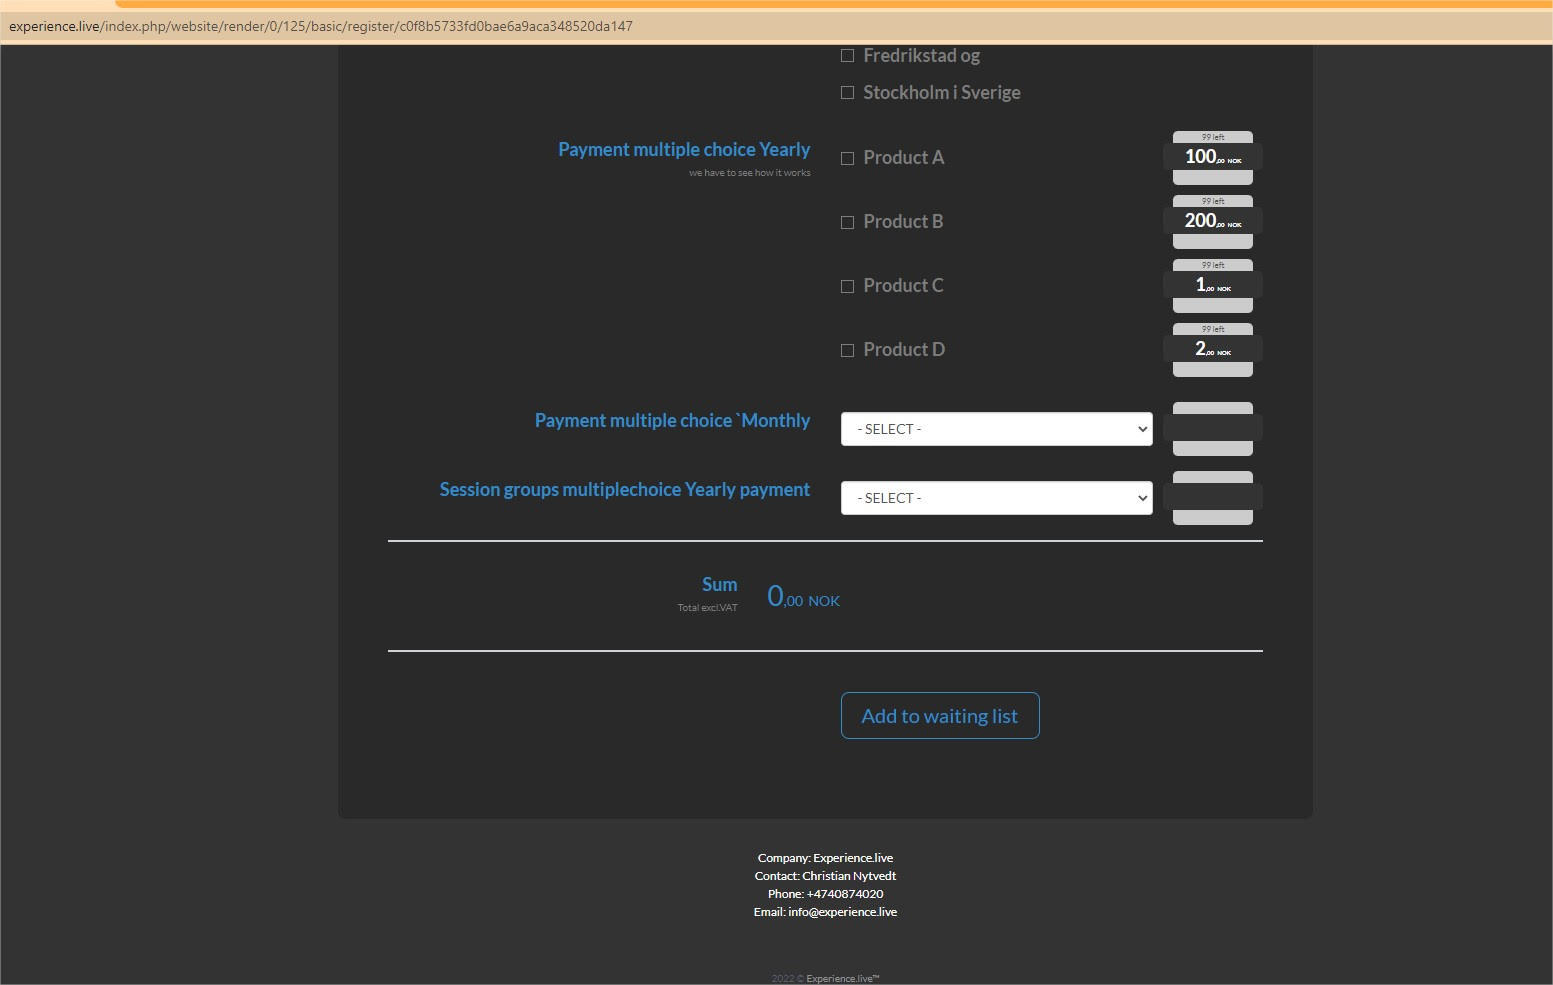
3. Users will come to register and will have these 3 steps in Registration process:
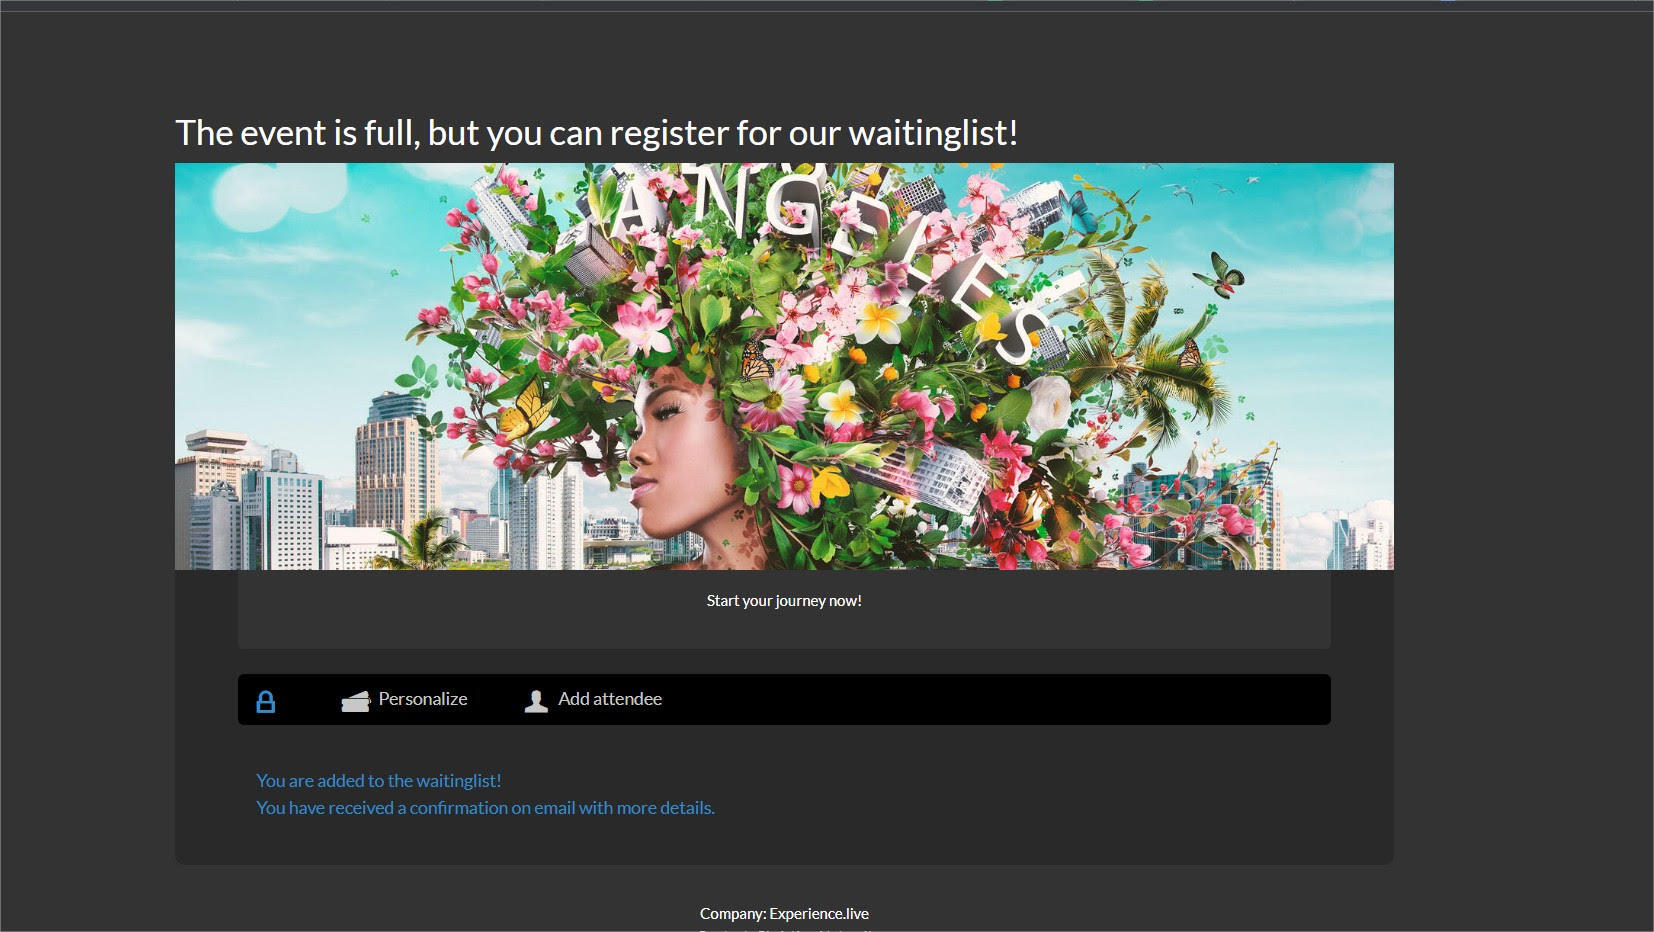
3.1 - first page they will see message and Register button:
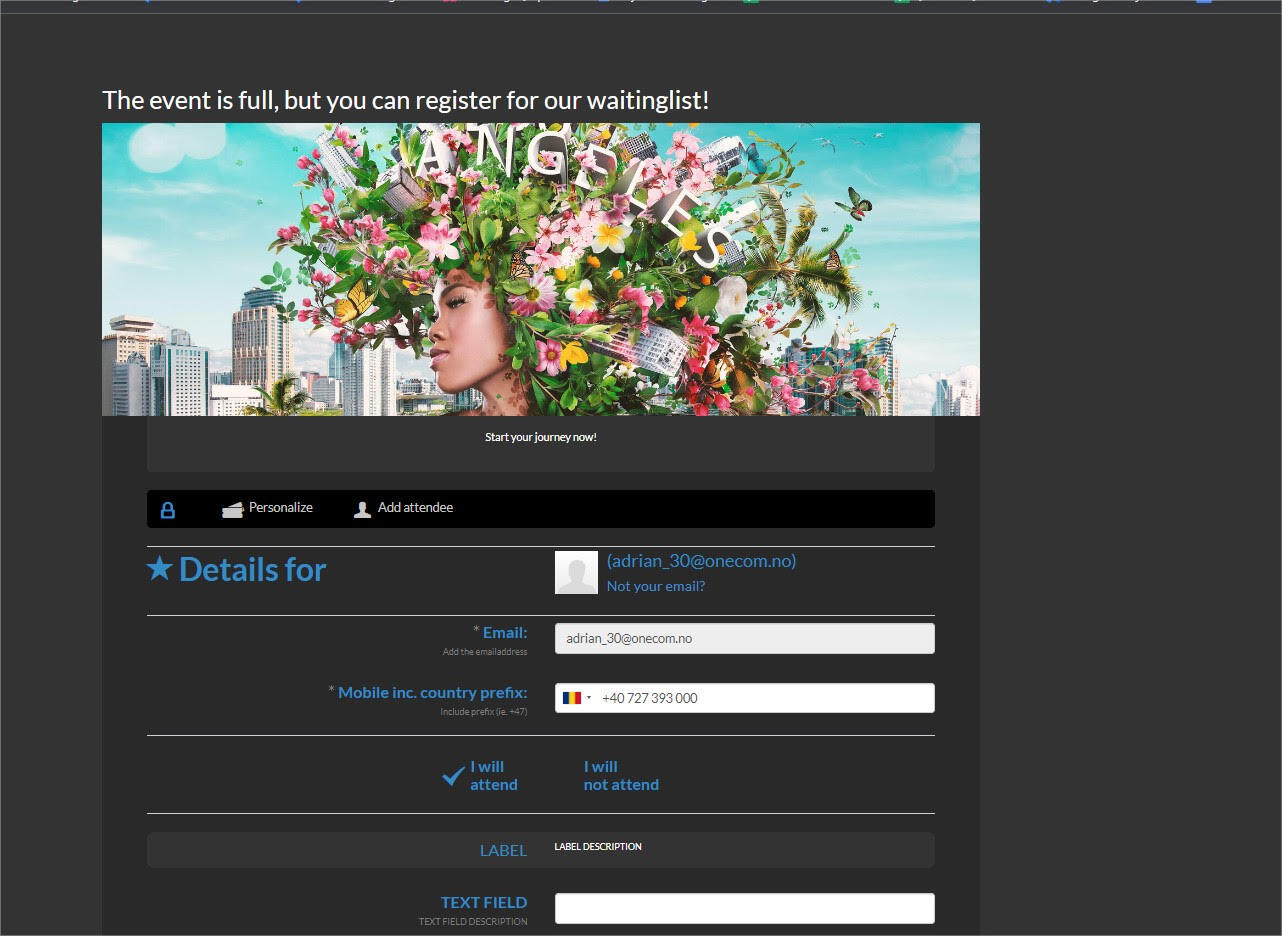
3.2 - second step / page where the users will add their details and click on Waiting List button:
3.3 Step 3 - last page where he will have a confirmation message:
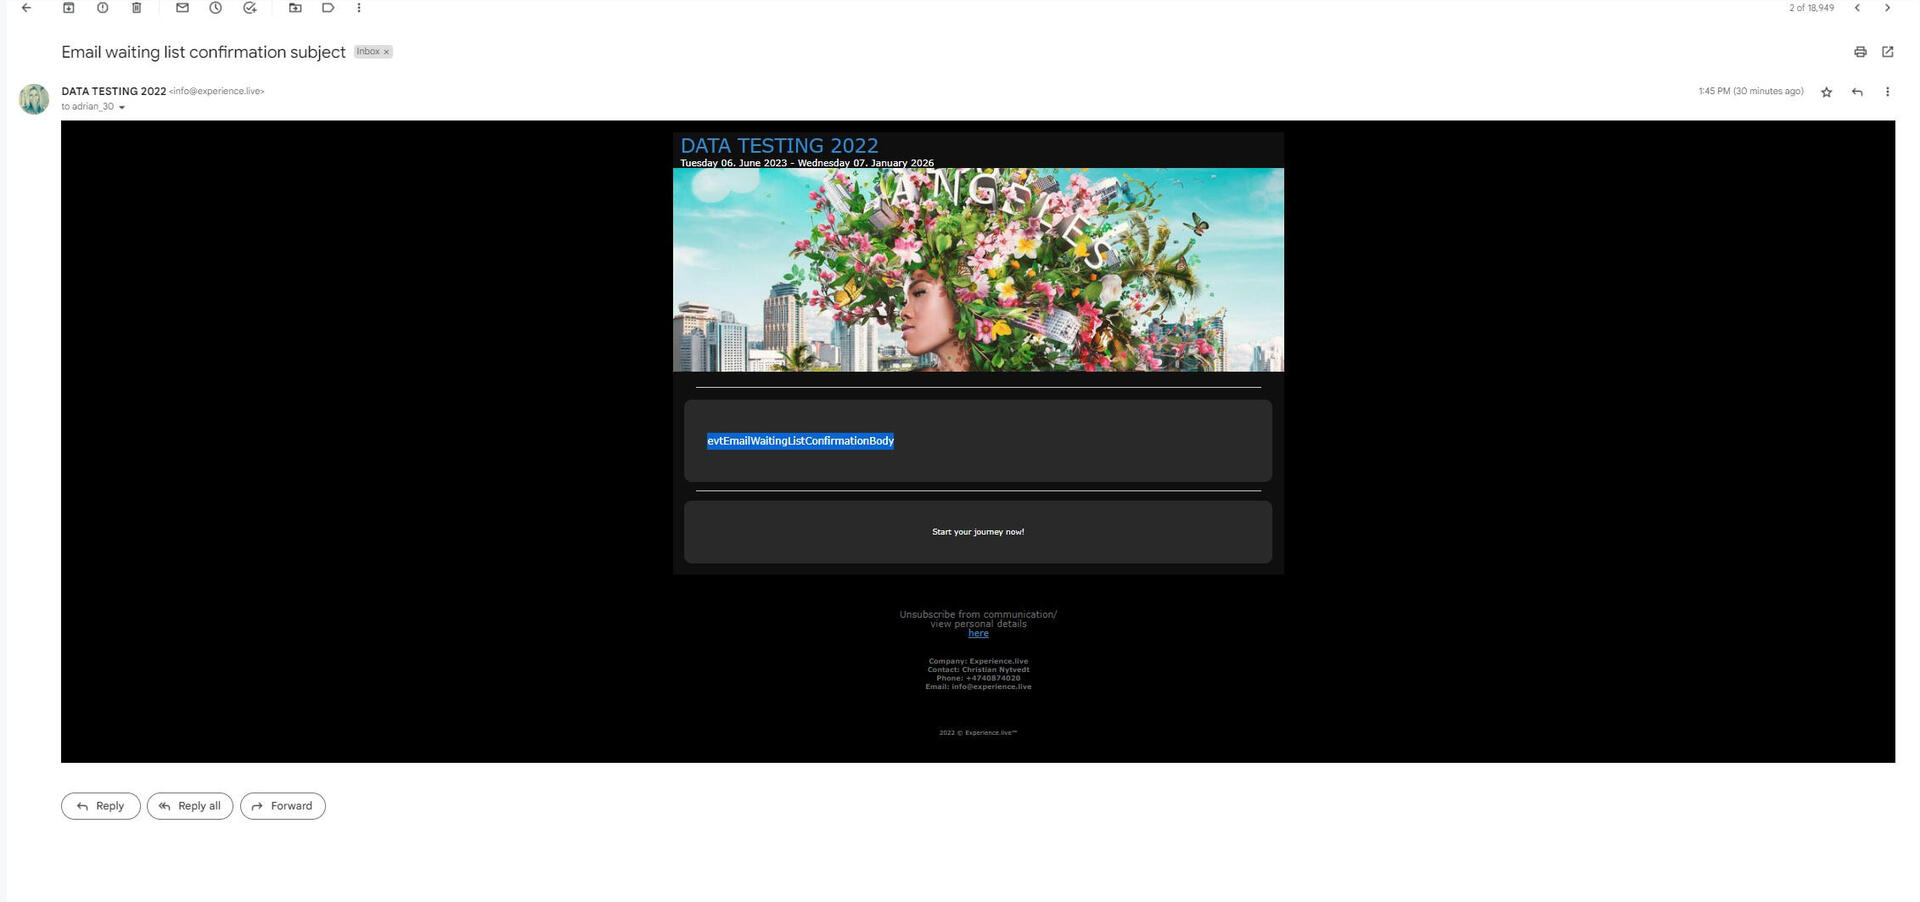
4. User will get an email or SMS with the message you added in Communicator Tab - Waiting list Confirmation.
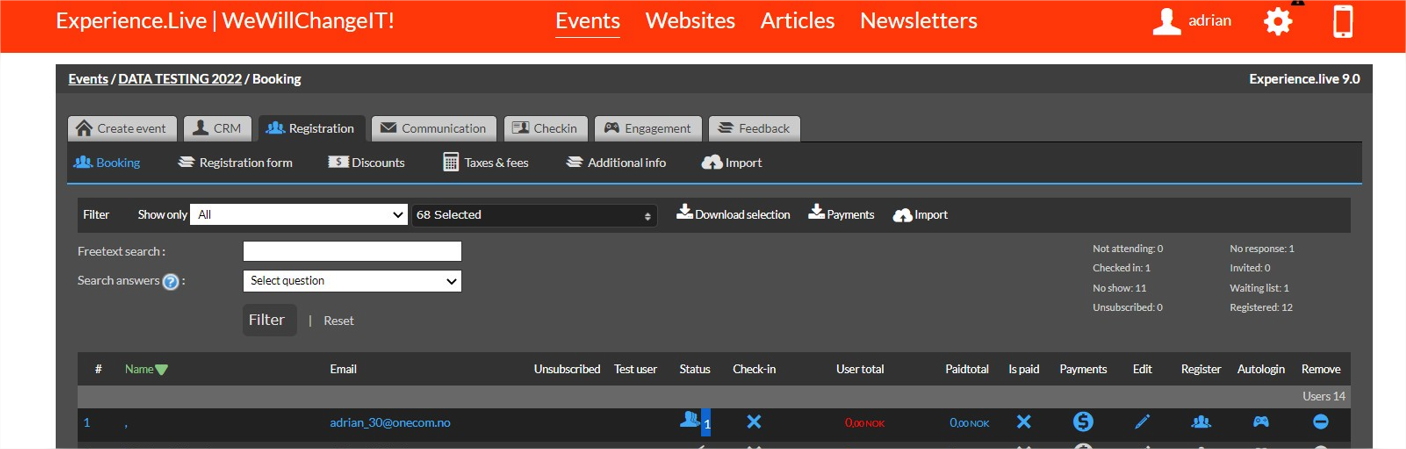
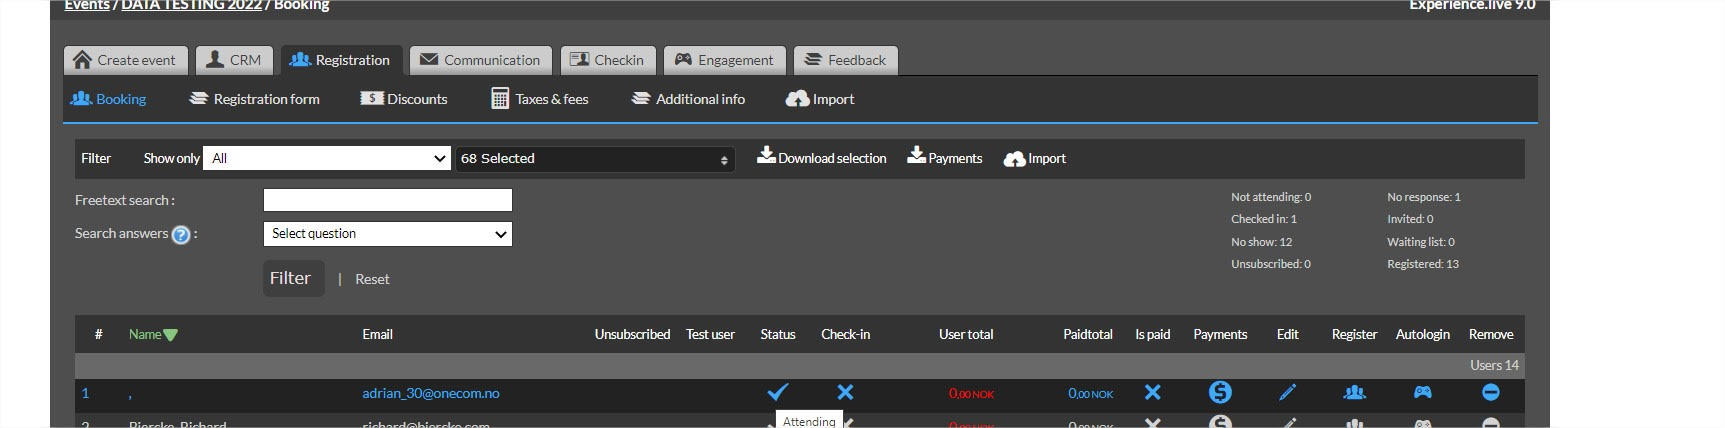
5. Once user got this he can be seen in Booking interface like this - and had a number behind in order they registered:
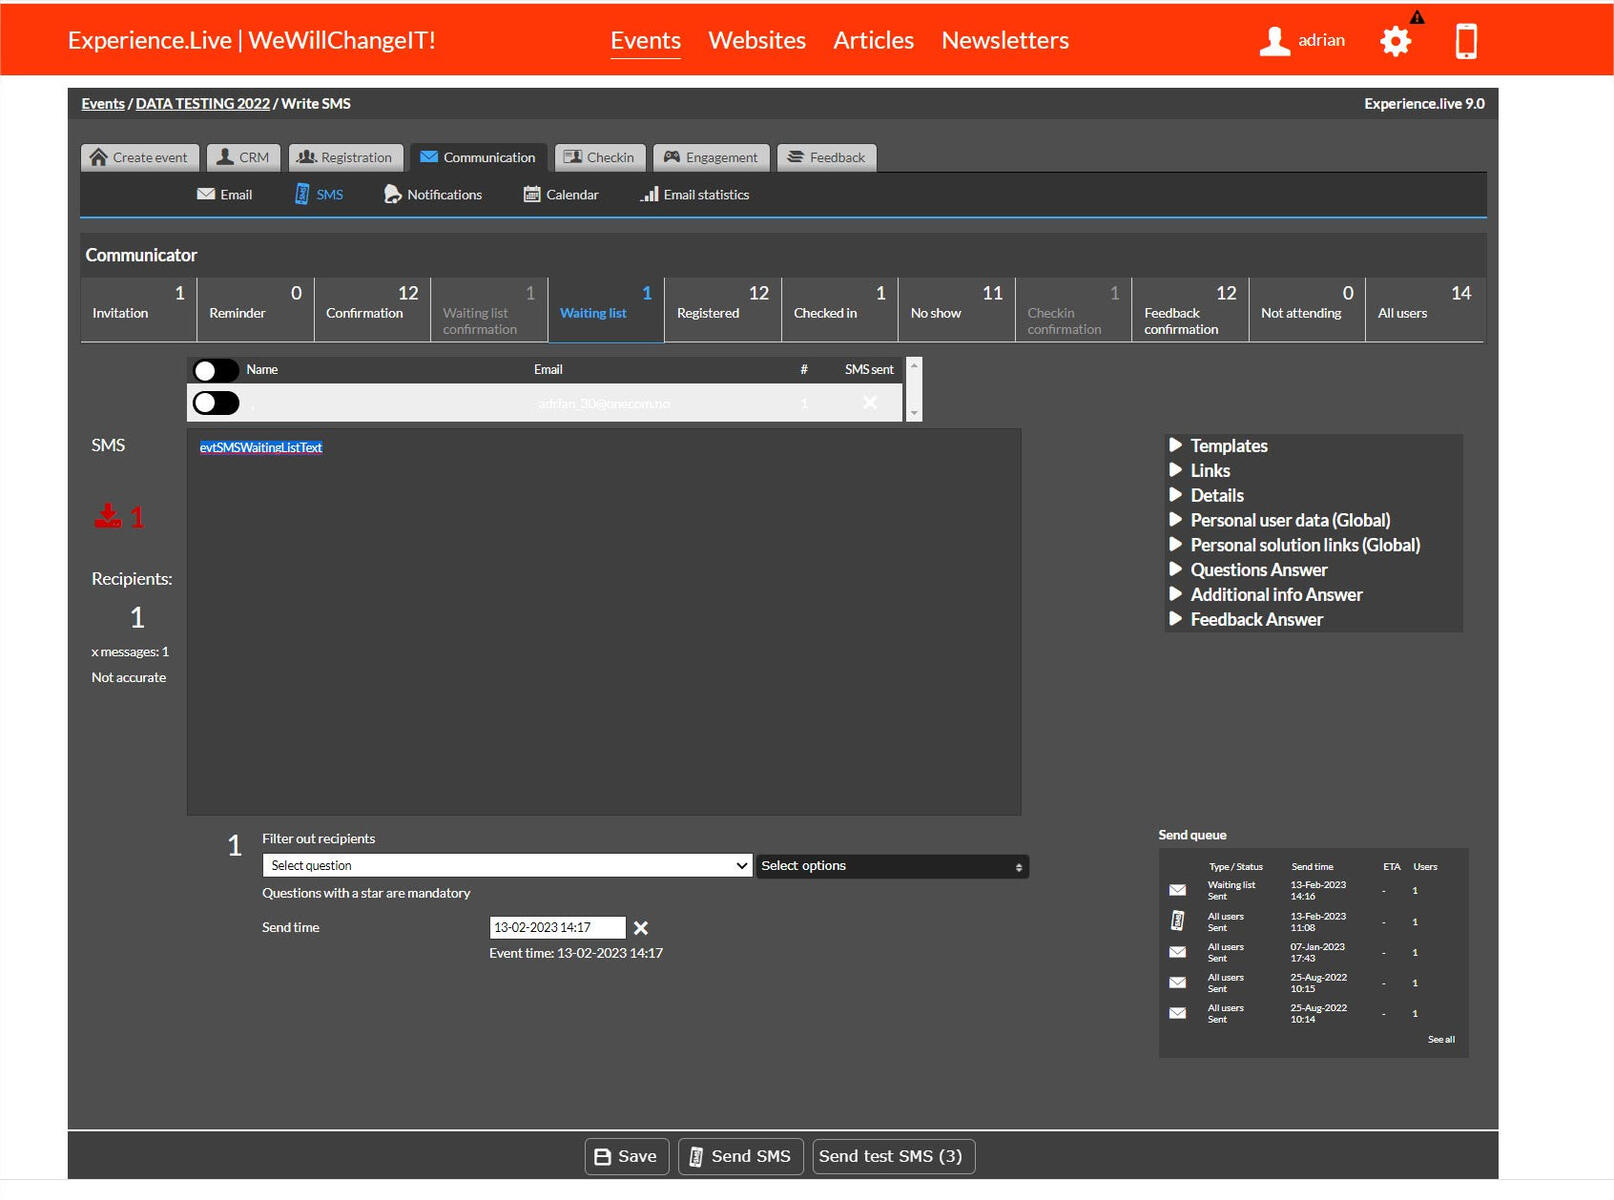
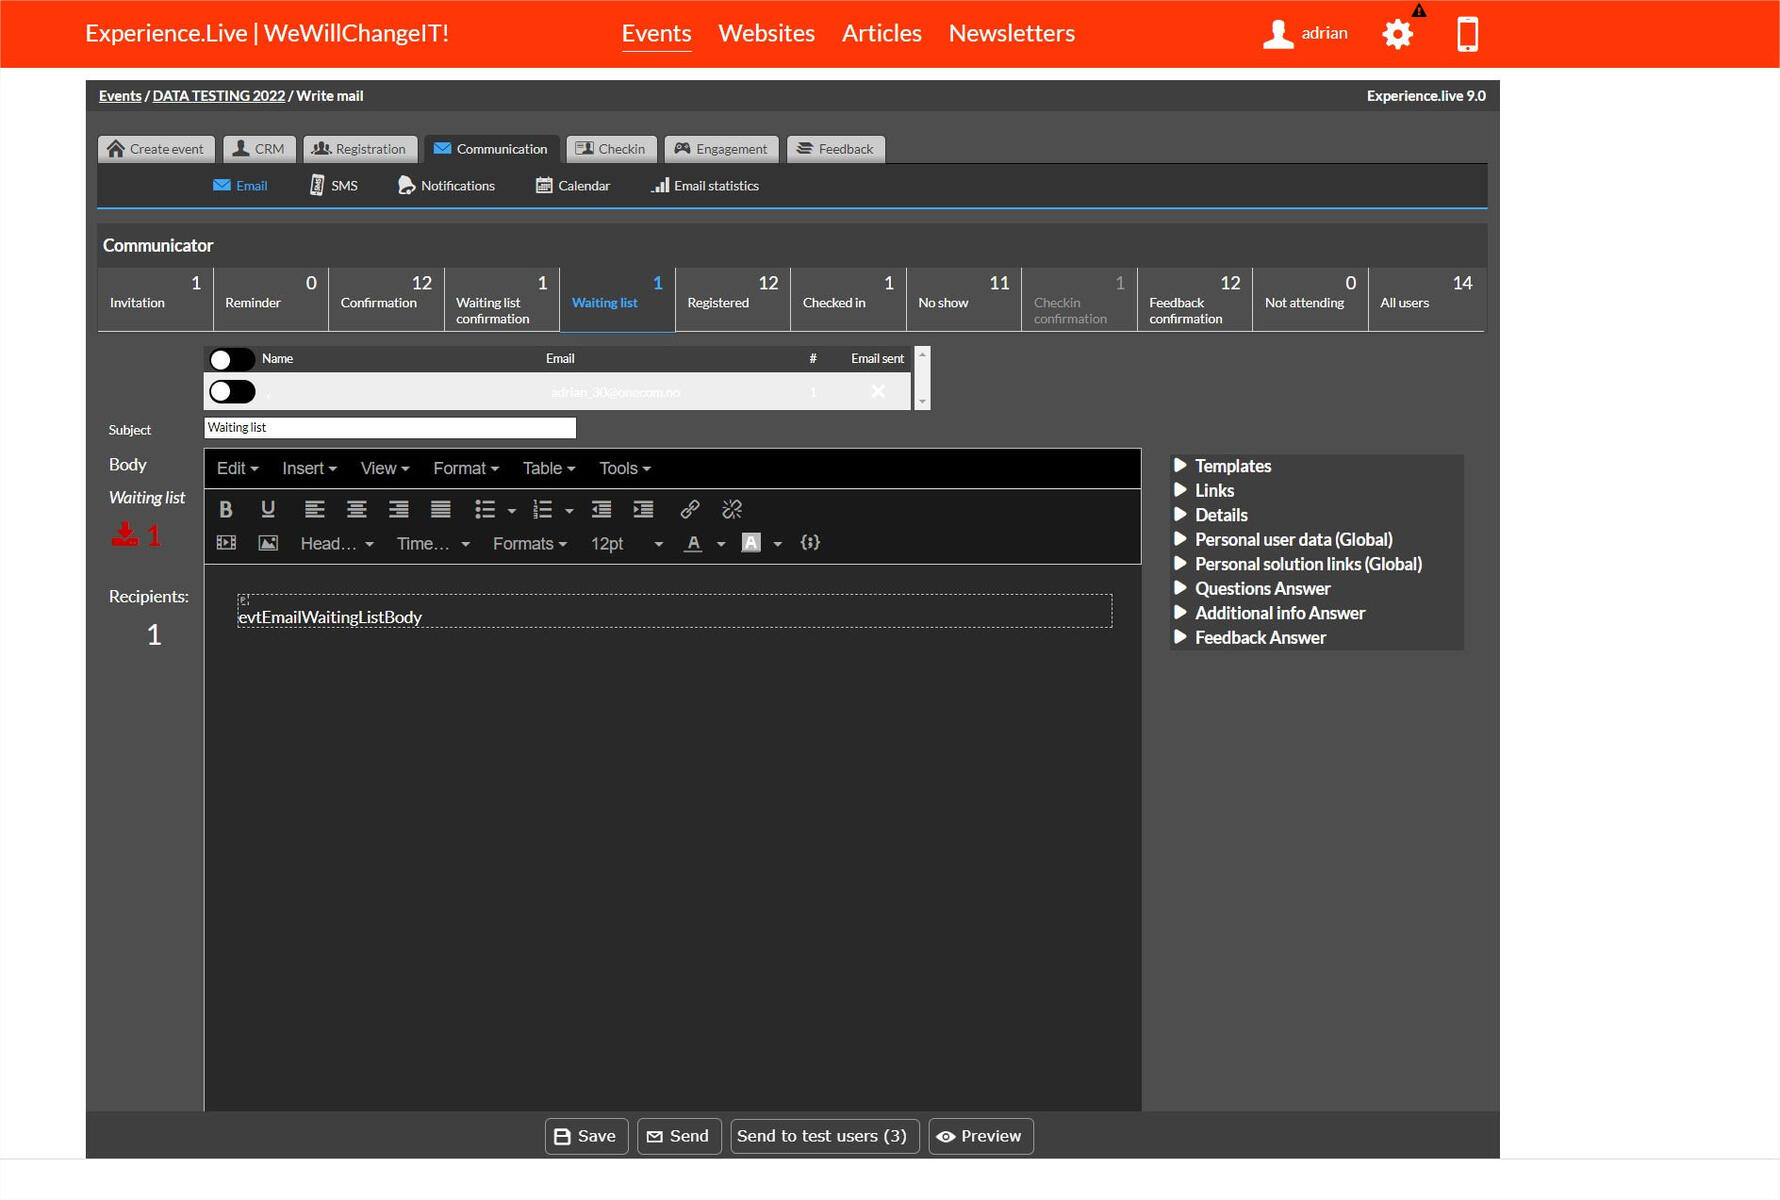
6. In the Communicator Tab - Waiting list will be there too and in the Communicator Tab Waiting list Confirmation (point above - the email/sms they will get). But we are interested here to send to participants one by one or multiple an email with the {[REGISTERWHENFULLURL]} renamed so they can bypasss the normal process as said in point 2.
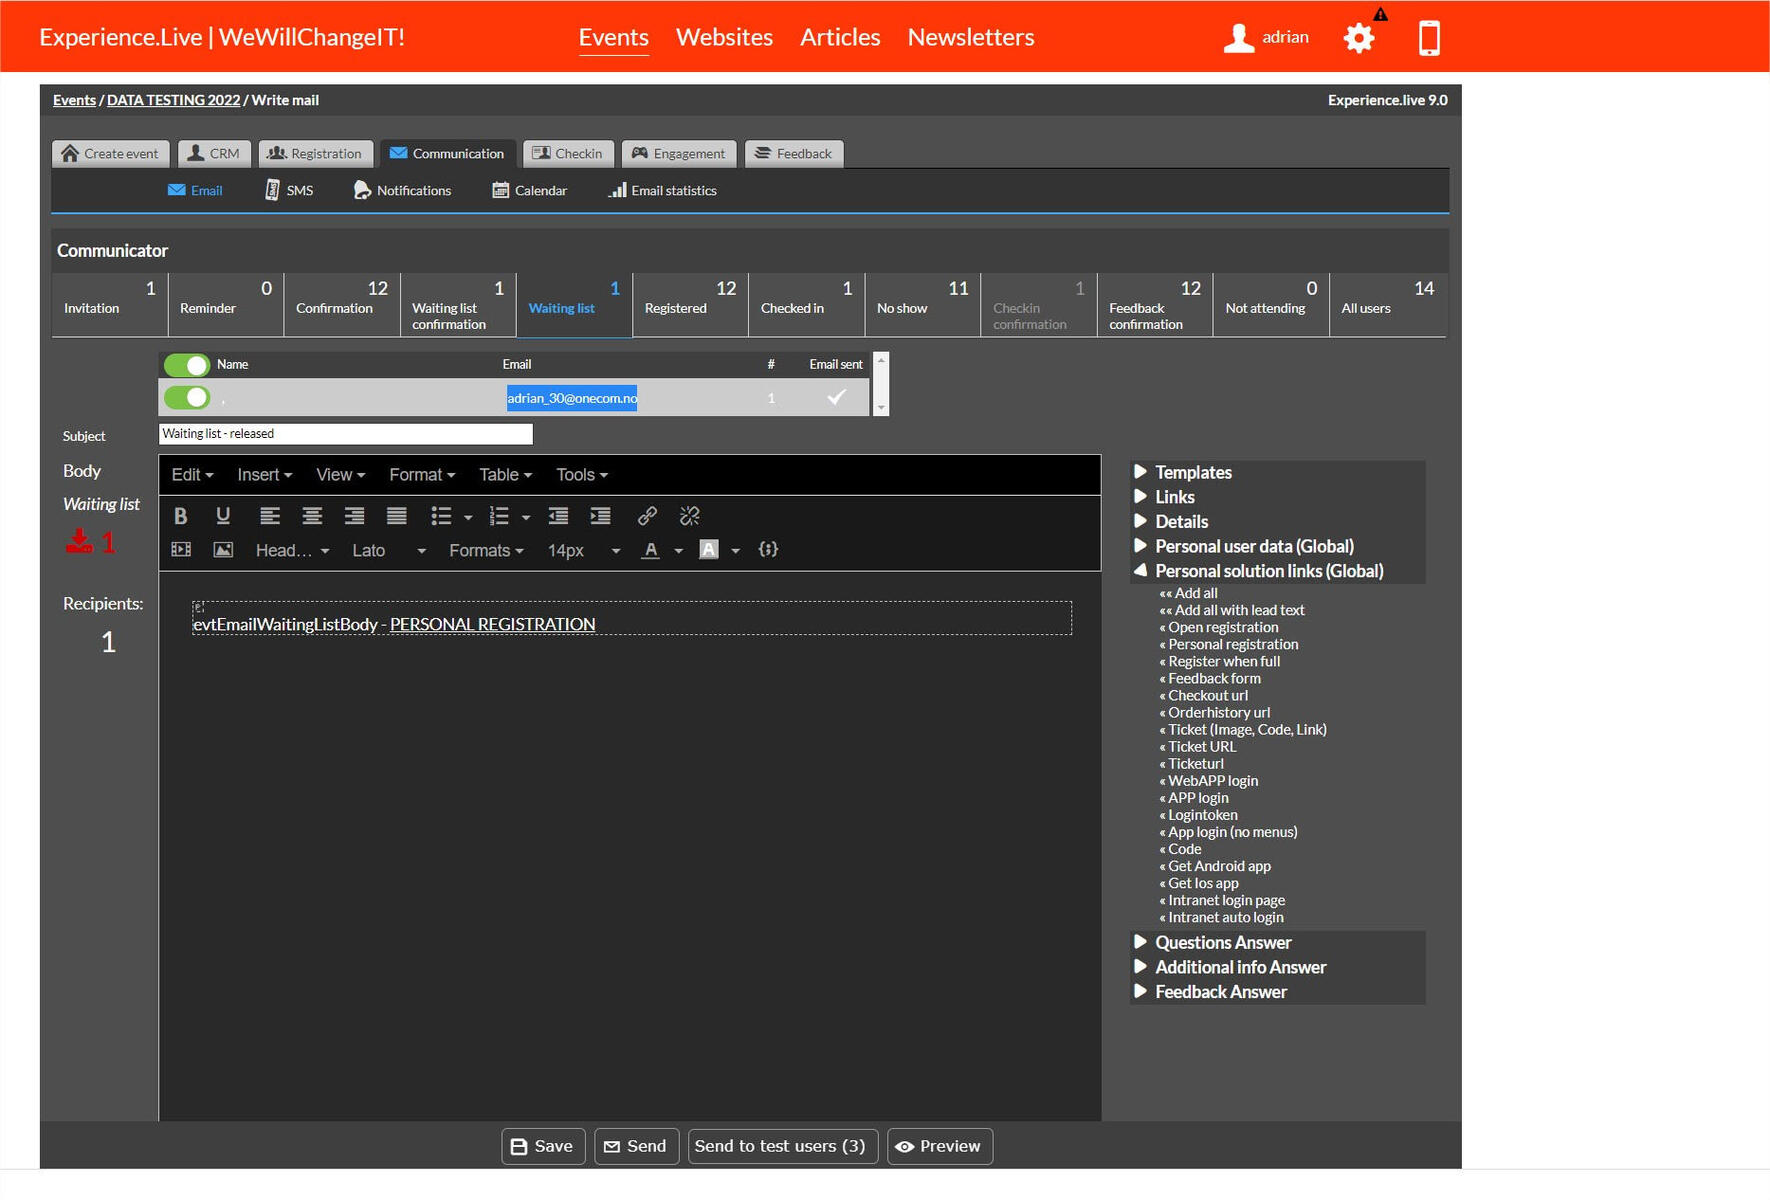
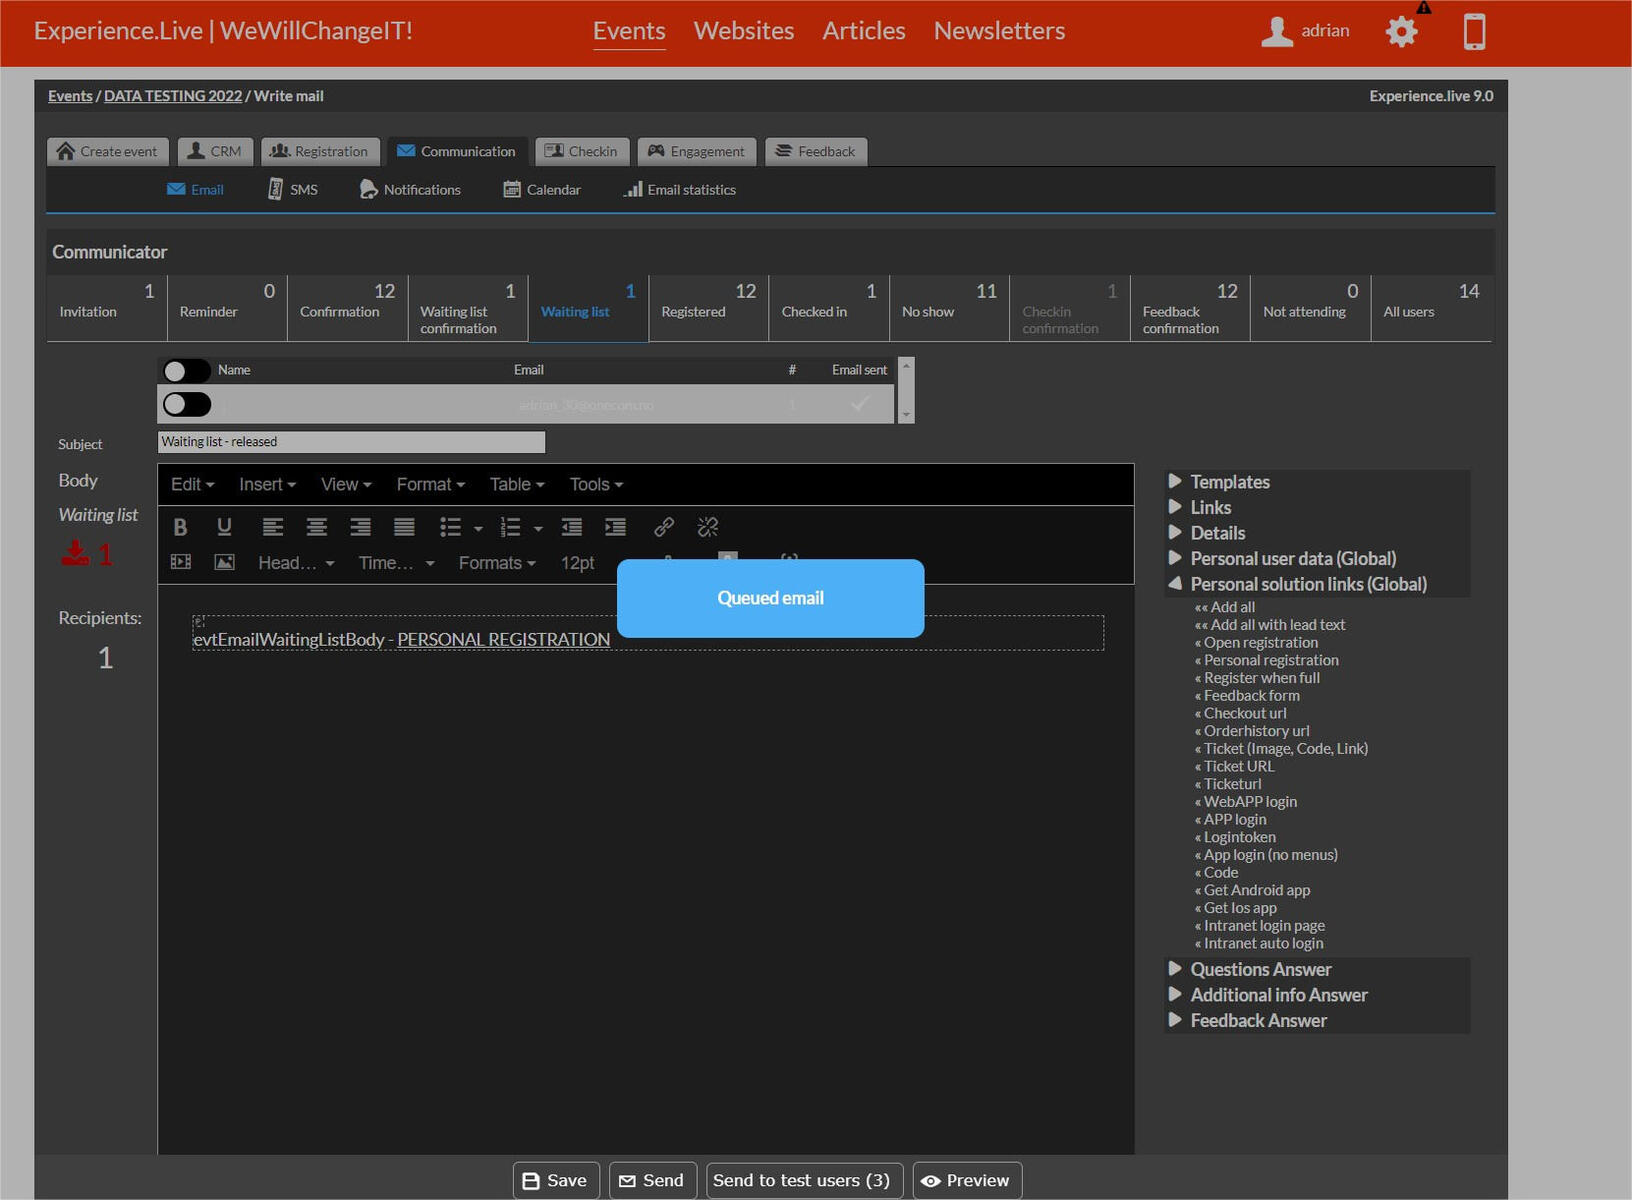
7. NOW when you decide you can accept more users you increase the number for those users and send from here email or sms - with personal registration email when is full - {[REGISTERWHENFULLURL]} renamed. In this list the users who will receive email from here will be shown with a checker sign like all is done.
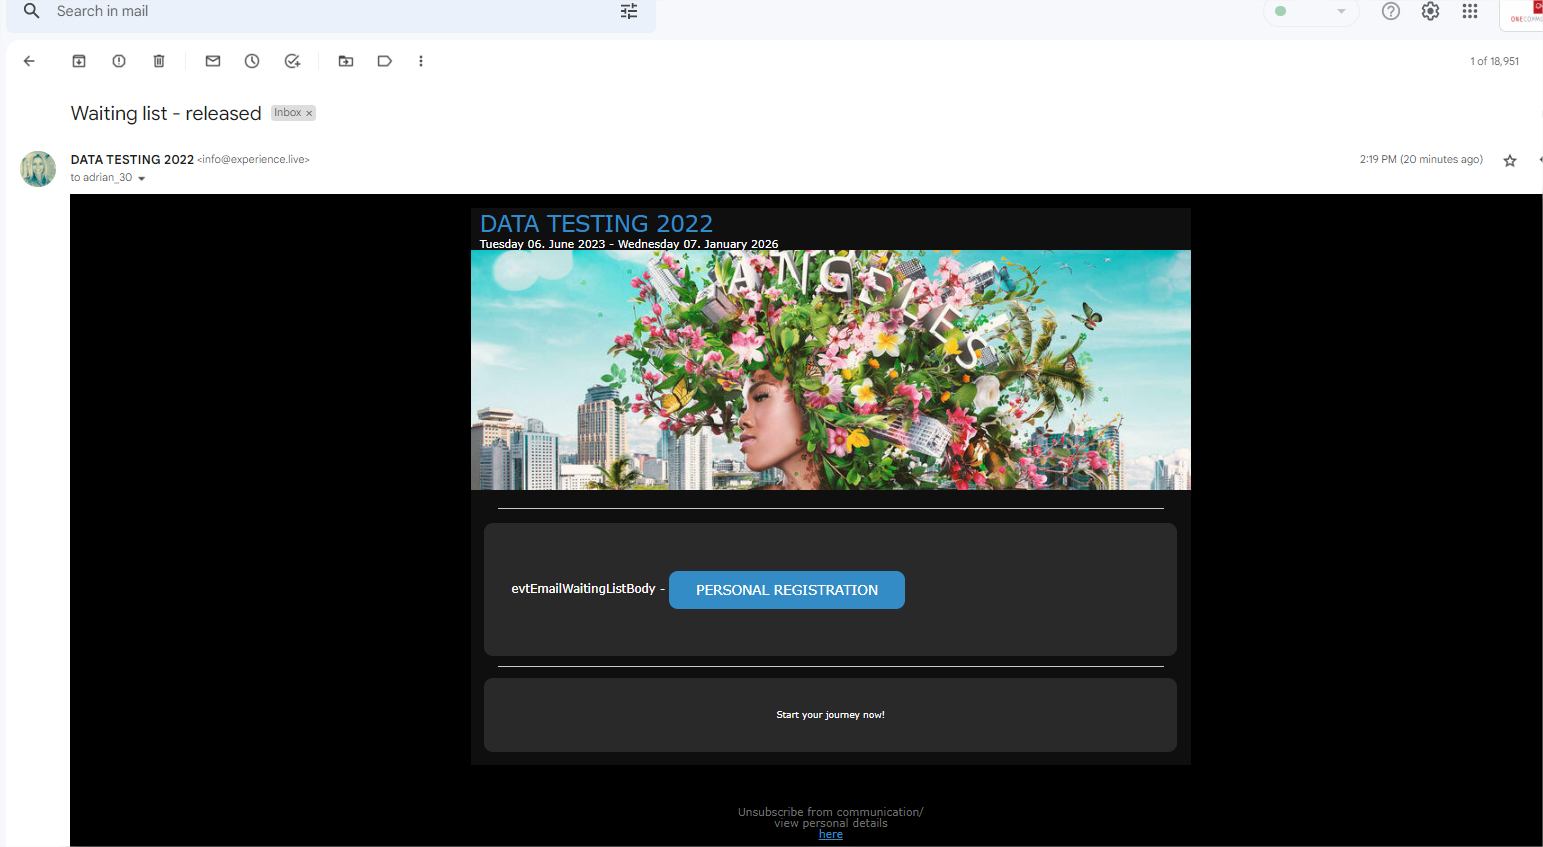
8. The users will get the email or sms with personal registration link:
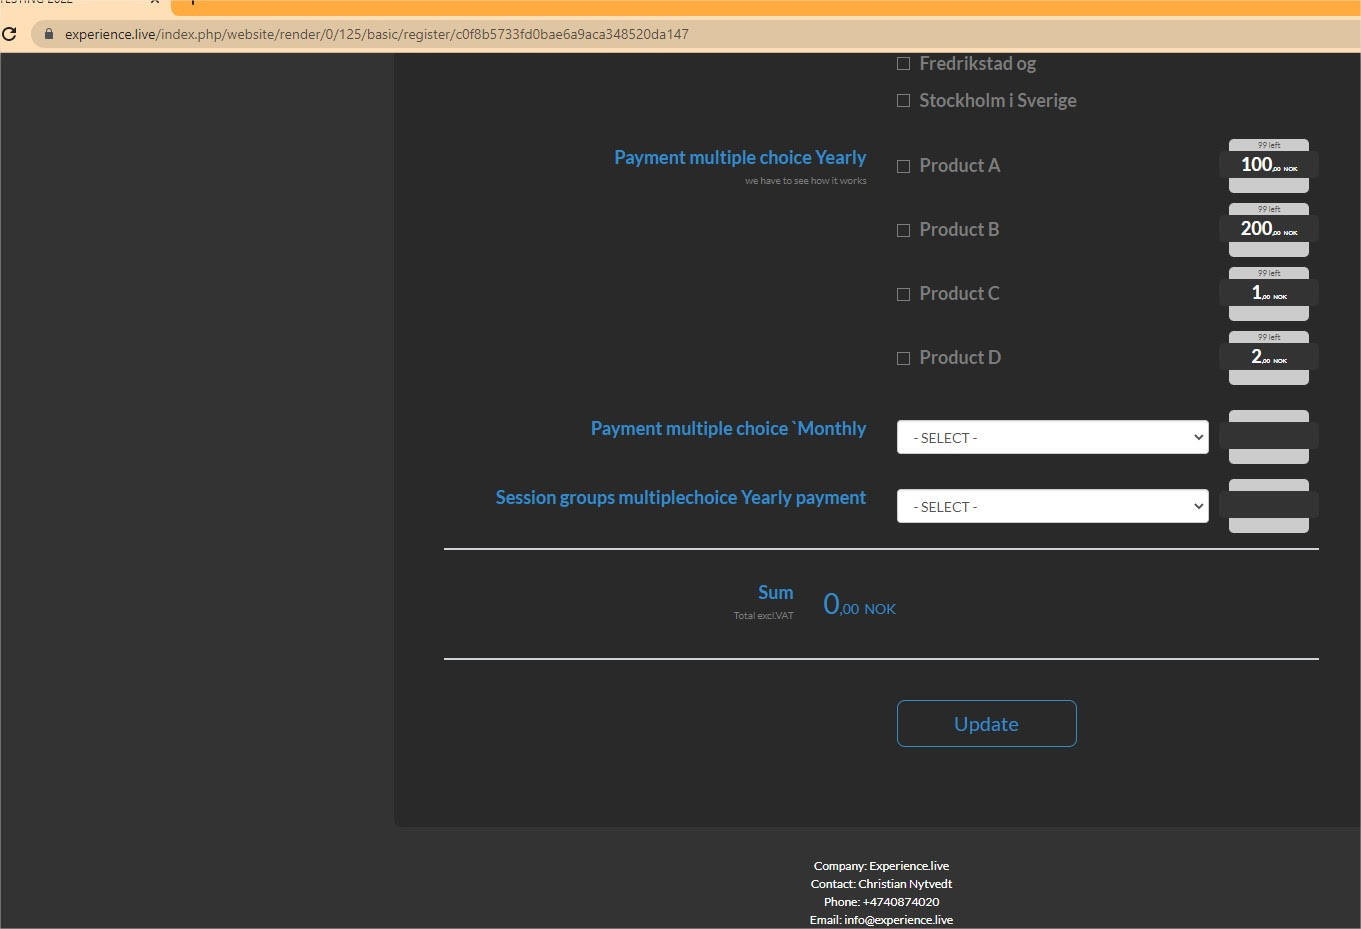
9. Users can click on the button in email and they will go in the second Registration form page where the will have this time Update button in the bottom of page - so they can register to the event:
10. Now users will become registered in the event and they can be seen in the Booking interface with Checked Registration sign and they will dissapear from the Waiting list confirmation and Waiting list tabs and they will be moved to Registered users tab and filters.
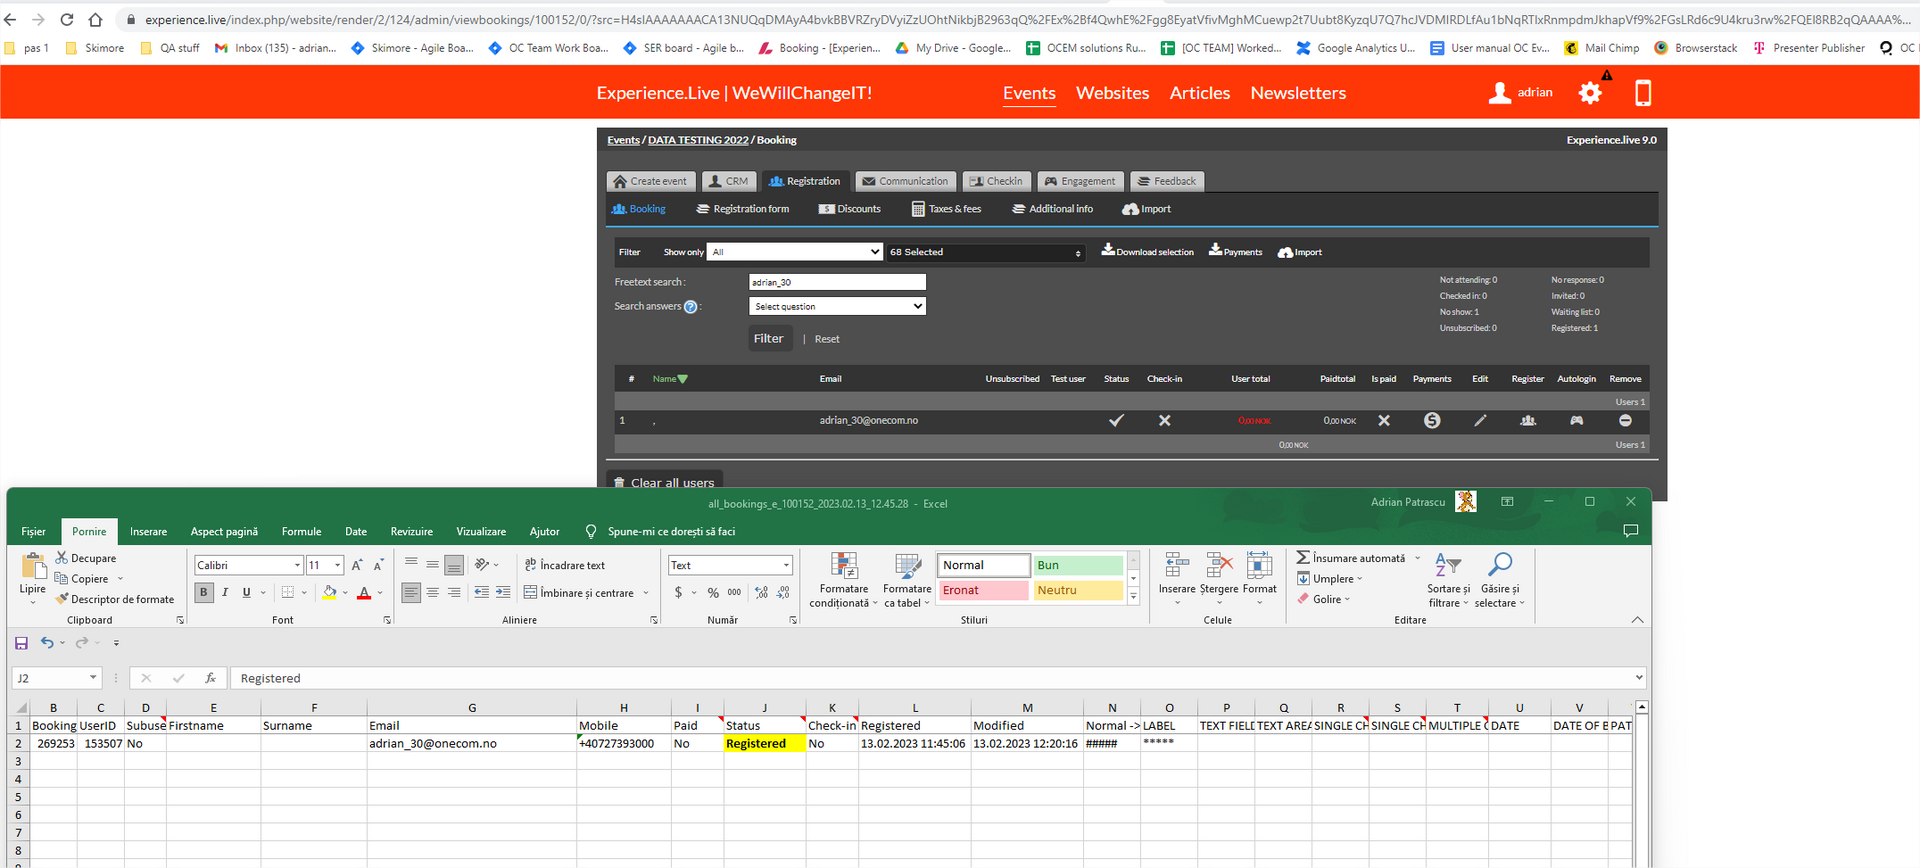
11. Steps 7-10 can be manipulated also with downloading the Excel file from booking and change the status to the users to registered - so you don't need to send other emails etc:
You need take also in consideration that you can send a Registered Users email at some point from Registered Users Communicator tab - and will include all users from before + the ones you added in excel and imported back with Registered status